Splitting your screen into two separate windows is a handy method of task management that fits well with busy Chromebooks. Splitting your screen is excellent for doing research, looking up tutorials, consulting multiple sources, comparing images or video, and much more. Fortunately, Chromebook makes this split option very easy to do or undo at a moment’s notice. Here's how to split screen on a Chromebook.
How to split screen on a Chromebook
Use the following step-by-step instructions to drag and drop your windows into a split-screen format. If you'd rather use keyboard shortcuts instead, skip to the second section about those shortcuts.
Here's how to use split screen on your Chromebook:
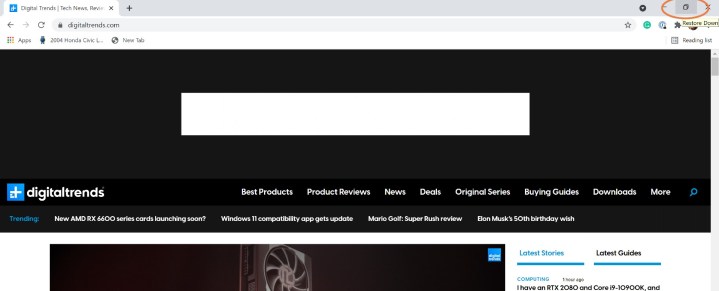
Step 1: Drag and position your first window. For this example, let’s start with a humble browser tab. Open your window as you normally would, and then look at the upper-right corner to see your options for window management.
Look for the small Window icon -- it’s typically the two-window “restore down” icon at this stage since the window is filling your entire screen, but it will change to a single-window “maximize” button when made smaller. For the purposes of splitting your screen, it doesn’t matter which version of the icon is there.

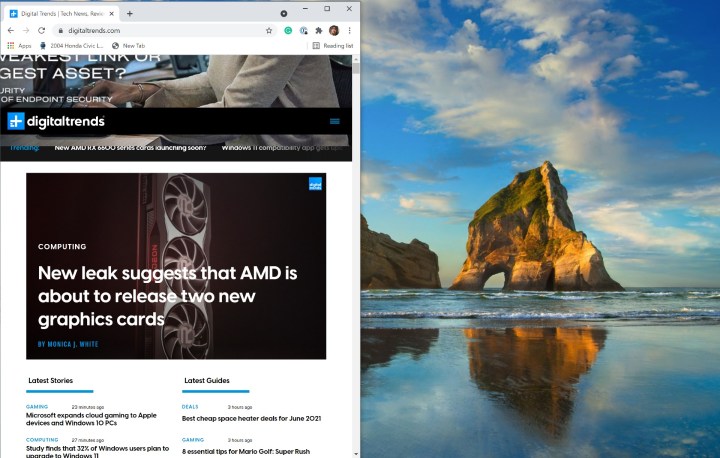
Step 2: Now, select that Window icon and hold. With the cursor held down, drag the window toward one side of your screen or the other. You should activate a lock-on function that will snap the window toward one side or the other of your screen, with a temporary divider line appearing to indicate you are splitting your screen.

Step 3: Release and the window will be locked onto the side you dragged it to, but otherwise, everything should remain the same. If holding down and dragging is annoying (such as while using a trackpad), try only holding down for a second and then releasing. Chrome OS should then show two Left/Right arrows around the icon that you can select to lock the window over to one side. It’s a little slower but could be easier in some situations.
Step 4: Position your second window. With your first window in place, it’s time to tackle the other side. Open up another browser tab that you want to access, and once it’s ready, again select and hold the Restore down/Maximize Window button in the upper-right corner. Drag this window to the opposite side of your first window, and it too should automatically snap into place, allowing you to release your cursor hold.
Now the two windows will be active on the screen at the same time, allowing you to move freely between them. One key point to remember is that the Restore down/Maximize button should be available on all your Chrome apps, so you’re not stuck only splitting browser windows -- you can also split a variety of apps and browser/app combinations as you need to.

Step 5: When you've finished with split-screen mode, select the Maximize button. This should return both windows to their expanded state and remove the locked-split screen. You can use the same trick to return to the split-screen whenever you want.
Since the whole process requires dragging and dropping, it generally works better and can be a bit easier with a mouse than a trackpad. To make the process even easier, you can try mastering some keyboard shortcuts. Or, check out our guide on how to split your screen on Windows 10.

Don't forget the keyboard shortcuts
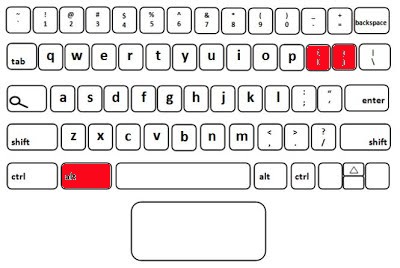
There are also keyboard shortcuts for splitting your screen on Chromebook, and this can make the process even faster if you plan on splitting your windows frequently and would prefer a shortcut to do it.
The shortcuts involve the Alt key and the bracket symbol keys. Select your window, and then press Alt + [ at the same time to lock the window to the left side, or Alt + ] to lock the window on the right side.


